Building the Console Box
A complete tutorial for building a Raspberry Pi-powered console and arcade emulator in a portable carrying case.
Electronic Components
Here's a price list for the electronic components behind (and including) the screen of your box. You'll require some version of (almost) every component below. See each item's description for alternate, sometimes less expensive, options. Prices are from Amazon.com as of January 2017.
| Name & Description | Cost |
|---|---|
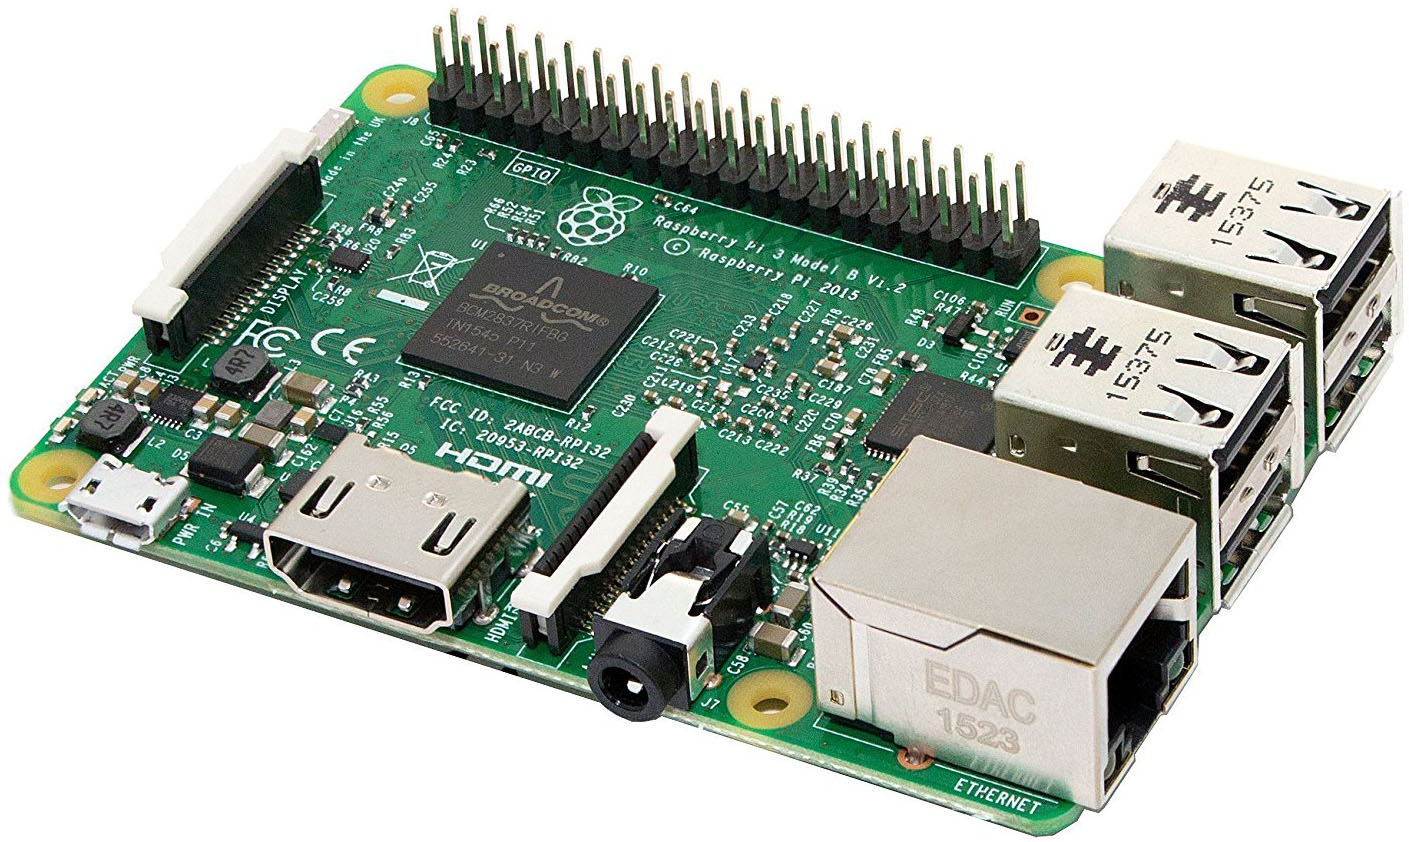
| Raspberry Pi 3, Model B The brains of the whole operation. The Raspberry Pi 3 is a 1.2GHz quad-core computer with 1GB of RAM. This board is sufficient to run everything up to and including a Nintendo 64 and Playstation 1, although performance may vary between ROMs. | $37.93 |
| 128GB SD Card This should give you plenty of storage for your ROMs including those bigger Sega CD images (600MB+ each!). If you don't plan on needing this much room you can save some money with 16GB, 32GB or 64GB cards. | $44.62 |
| 10.1" HDMI Screen There are tons of HDMI screens available for the Pi. This just happens to be one that I've found that has a higher resolution (1280x800) and will run on 5V (which is what our battery likes to output). You'll find the same controller board available on tons of different screens so they should all run on 5V, even if the description says 12V. You can save some money here by going with a lower resolution or smaller screen (7" is another popular size). | $79.99 |
| Anker 13000mAh Battery This rechargeable battery pack should provide about 8 hours of play time with the recommended components. This version includes a micro USB input for power, but a USB-C version is available as well. The only difference would be the cable you'd use to connect the front power input connection to the battery. If you want even more play time between charges check out the 20100mAh or 26800mAh which is the largest lithium ion battery you're legally allowed to travel on an airplane with! | $31.99 |
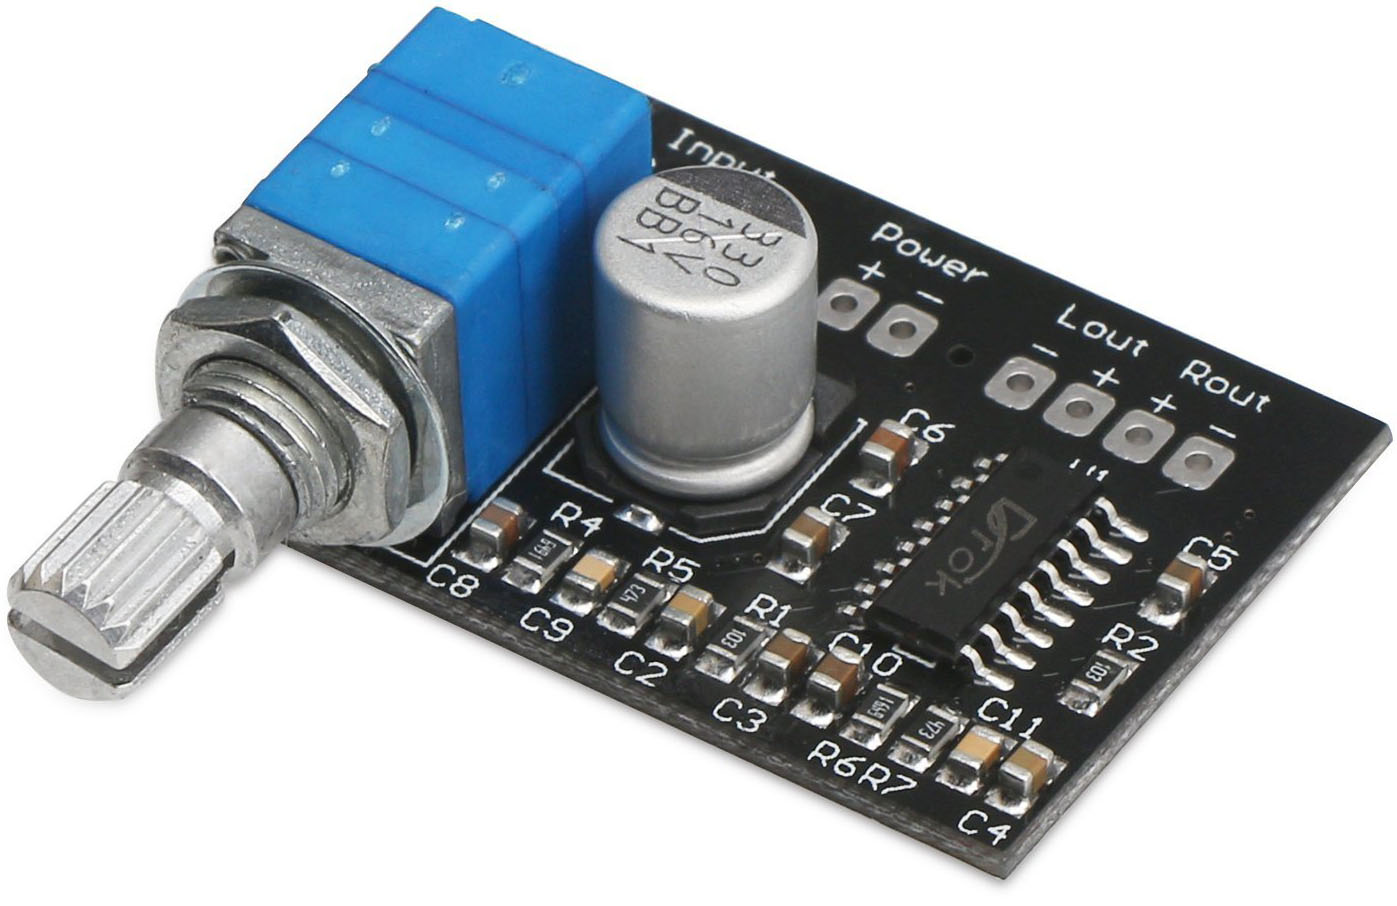
| DROK 3W Audio Amplifier This unit powers your speakers and provides volume control. With the recommended speakers below 3W is more than enough (turning the volume up half way is louder than I'd ever need them to play) but there are 5W and 15W versions available as well (just make sure your speakers can handle the additional power at higher volumes). You also need to double check that the board still fits in the provided space in the design. | $8.55 |
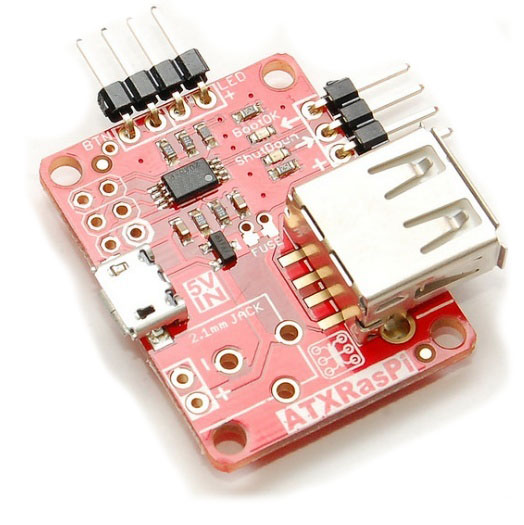
| RaspiATX Power Controller The Raspberry Pi has no power switch (you turn it on and off by plugging in the power) so we need a way to control that from the front panel of our box. This controller allows us to that. One press to turn the Pi on. After that, a short press reboots it and a long press starts shutting it down. It sends a signal to the Pi and it gracefully turns itself off. Then the RaspiATX cuts power to the Pi completely so it's not draining the battery. This will also cut power to the relay that feeds power to the screen and audio amplifier. Pick the "add USB type A (female)" option in the Output power options section when adding it to your cart (this way you can put a standard USB cable between the output of this and the input of the Pi). | $17.95 |
| 2" Aluminum Full-Range Speaker (x2) A great sounding speaker that even has a little bass. You can find cheaper speakers at similar sizes, but you'll probably need to update the mounting holes in the faceplate to match. Make sure you get two of these! | $11.52/each |
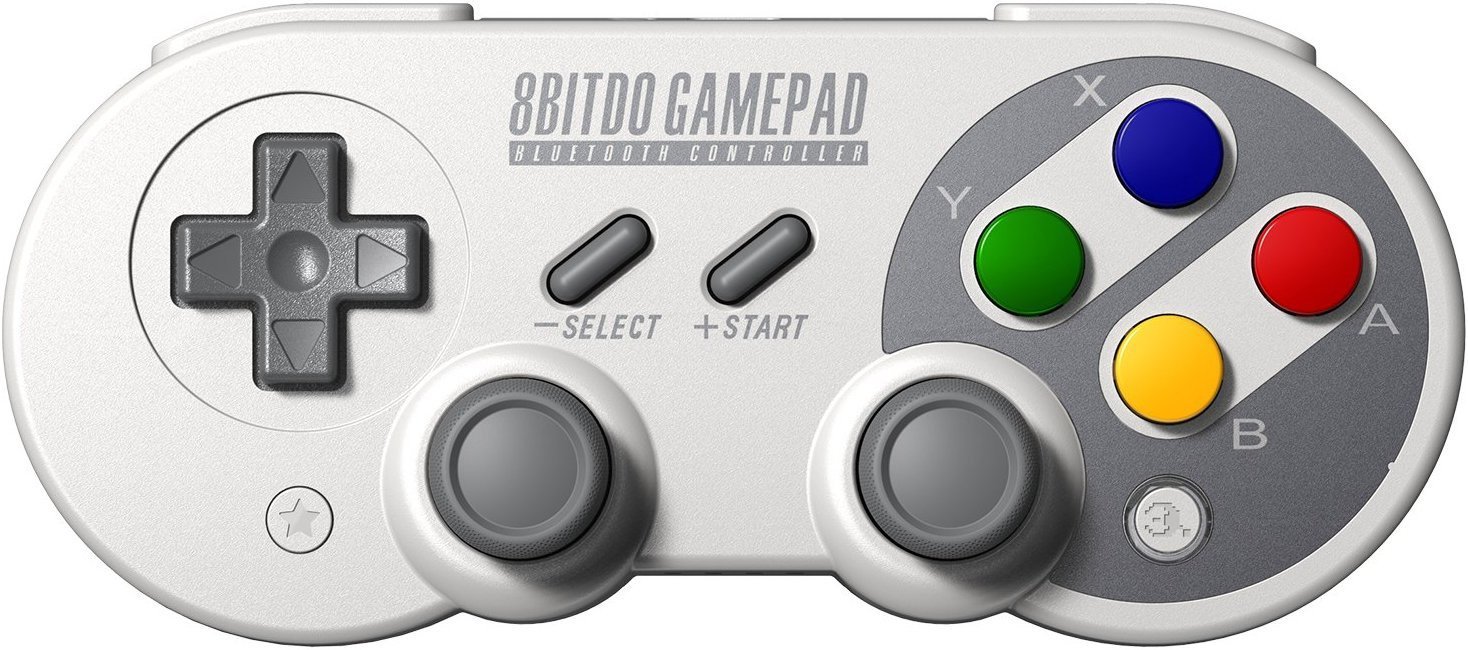
| 8bitdo SF30 Pro Controller (x2) Quite possiblity the most important part of your system! These controllers have the great Super Famicom/SNES layout plus analog sticks and a second pair of L and R buttons, making them compatible with every system up to and including the latest Playstation and Xbox conrollers. Also available with the SNES color scheme (and concave X/Y buttons) I can't say enough about how much I love these things, even if they are pricey. If you don't need the analog sticks take a look at the less expensive SNES30 or NES30 for even retro-er styling but still with 4 main buttons + L and R. | $49.99/each |
| Sound Blaster PLAY! 3 Unfortunately the audio output on the Raspberry Pi is absolute garbage. I'm talking about the headphone jack, not the HDMI audio out (which sounds great). This USB soundcard plugs into the Pi and gives you great sound again. You could leave this out altogether and plug directly into the Pi, but if you care about sound at all you'll regret it. | $24.99 |
| USB-C Connector We need a way to charge the battery once it's hidden away inside the box so we'll need a connector to the outside world. The controllers have USB-C connectors and come with cables so I figured to keep things simple I'd use USB-C for the charing port as well. If you go with a different 8bitdo controller you'll get micro-USB connectors so you might one one for the charging port as well. | $5.88 |
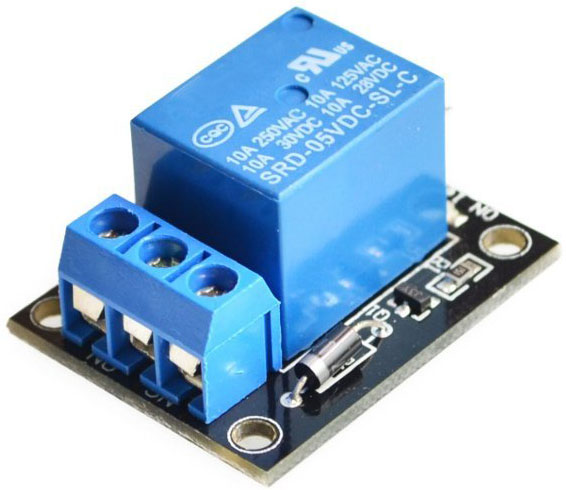
| 5v Relay When the Pi turns on it should turn on the screen and audio amplifier at the same time. We do that with a relay. The battery has 2 USB connectors. One goes to the Pi, the other goes to this relay and will feed the screen and amplifier once the relay gets the 5v turn on signal from the Pi's GPIO pins. | $5.80 |
| HDMI Coupler For connecting to the Pi to the screen controller board. You could use a regular HDMI cable instead, but it will take up more room inside the enclosure. You can buy these in singles but it'll come from China and the shipping will take a month or more. | $5.99 |
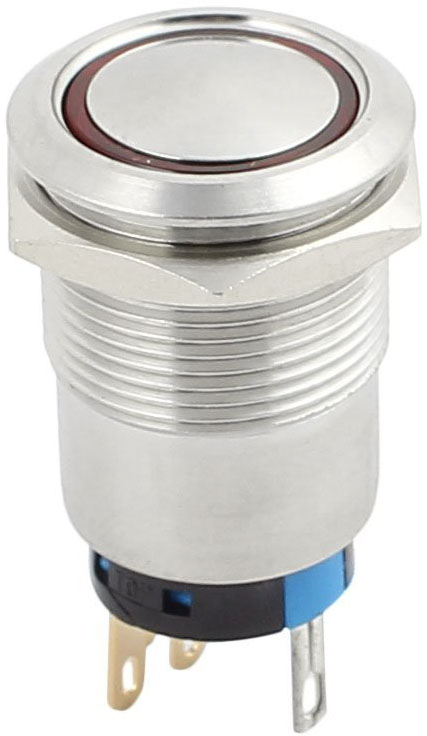
| Power Switch We need a way to turn everything on and off. I like a nice quality button so I went with this one, but this is one place where you could save money. You can find much more inexpensive switches that will do the job, but other than the controllers this is just about the only other thing you'll interact with on your box so why not make it a quality component? If you go with something else, make sure it's a "momentary" switch (meaning it's only ON while pushed). | $9.60 |
| USB Hub If you don't want to rely on only the bluetooth connection on your controllers for input to the Pi you'll want to provide a way for the user to attach other devices. Maybe you want to hook up 6-button Mega Drive/Genesis controllers, or a keyboard, or anything else you can connect via USB! | $6.99 |
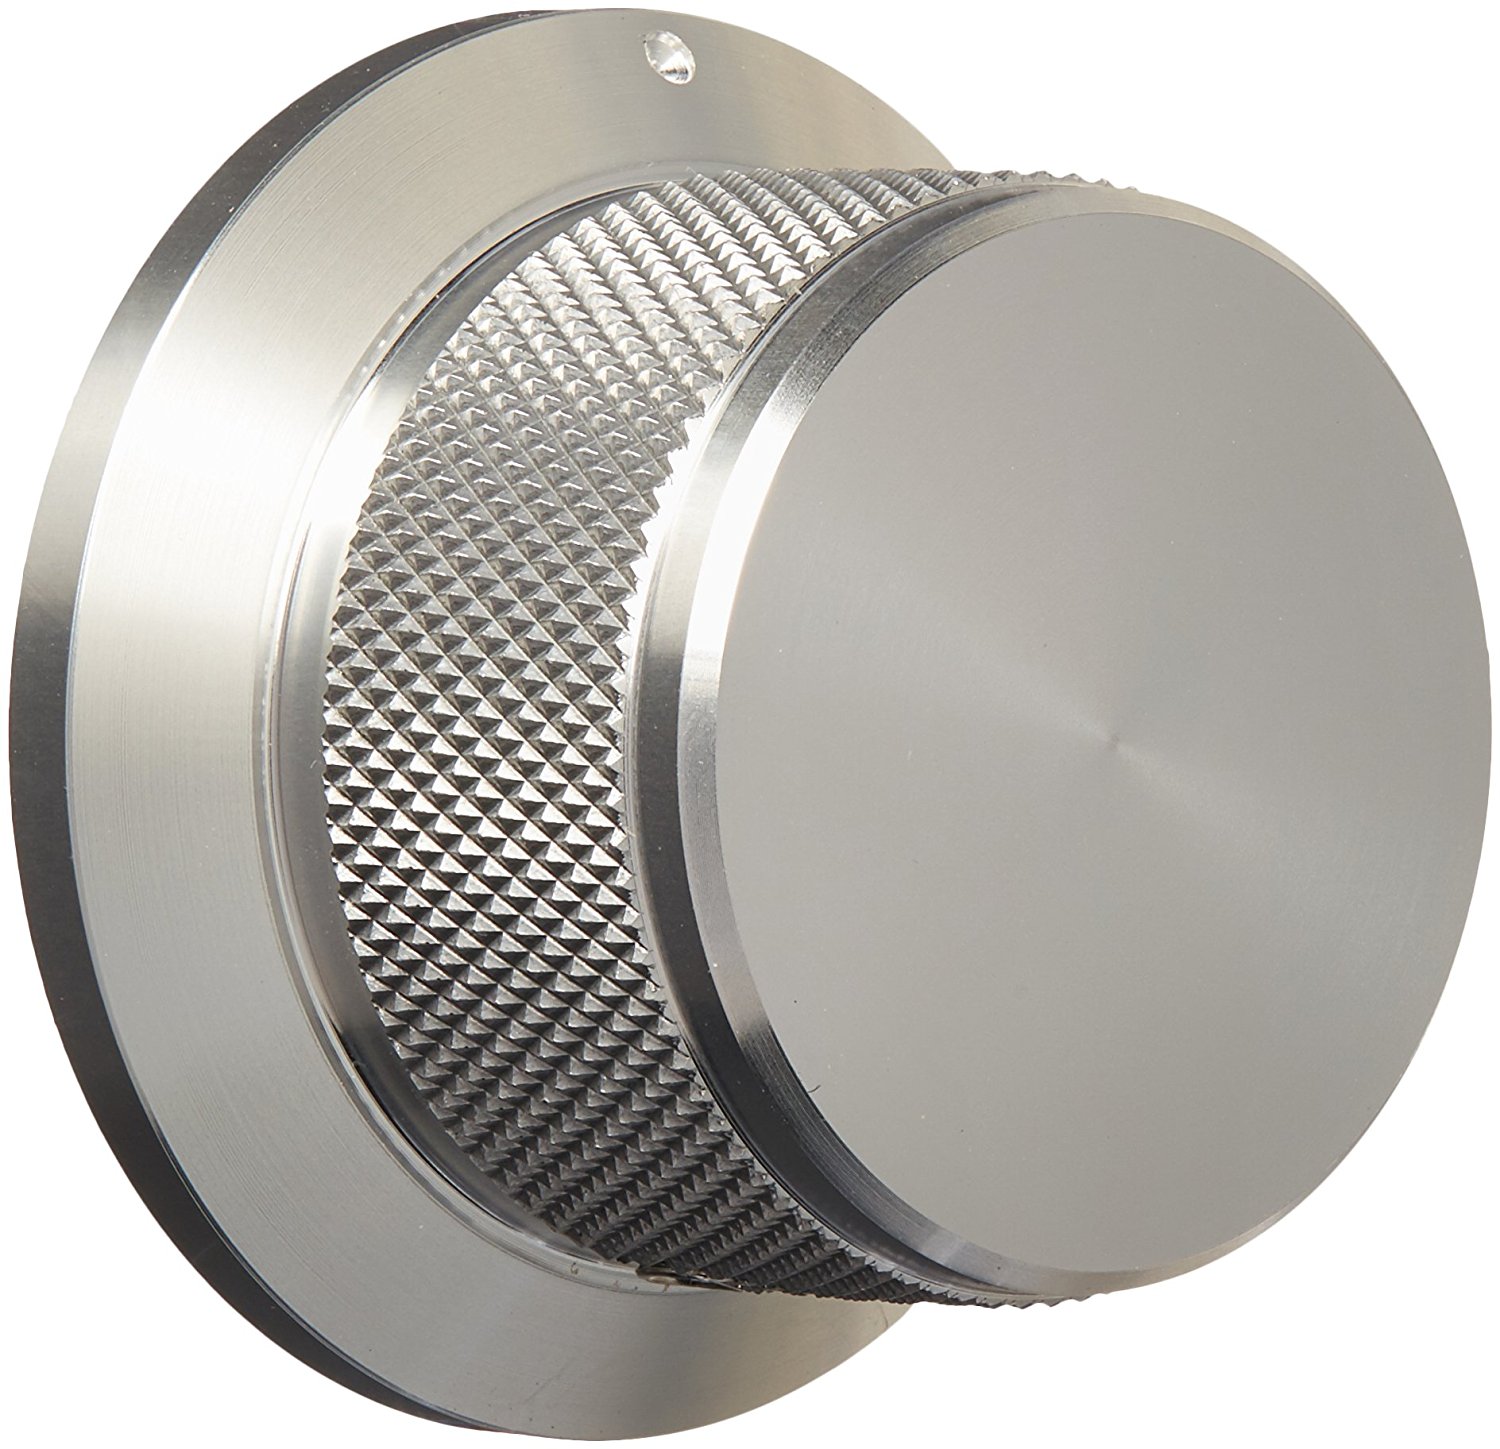
| Volume Knob This is probably the most extravagant purchase in the whole build. I like a nice knob and finally found this one. It's heavy and looks amazing. The amplifier board comes with a little black knob which works fine but in my opinion doesn't match the rest of the components surrounding the screen (stainless steel and aluminum). This knob helps tie everything together, but there are plenty of other options. | $13.63 |
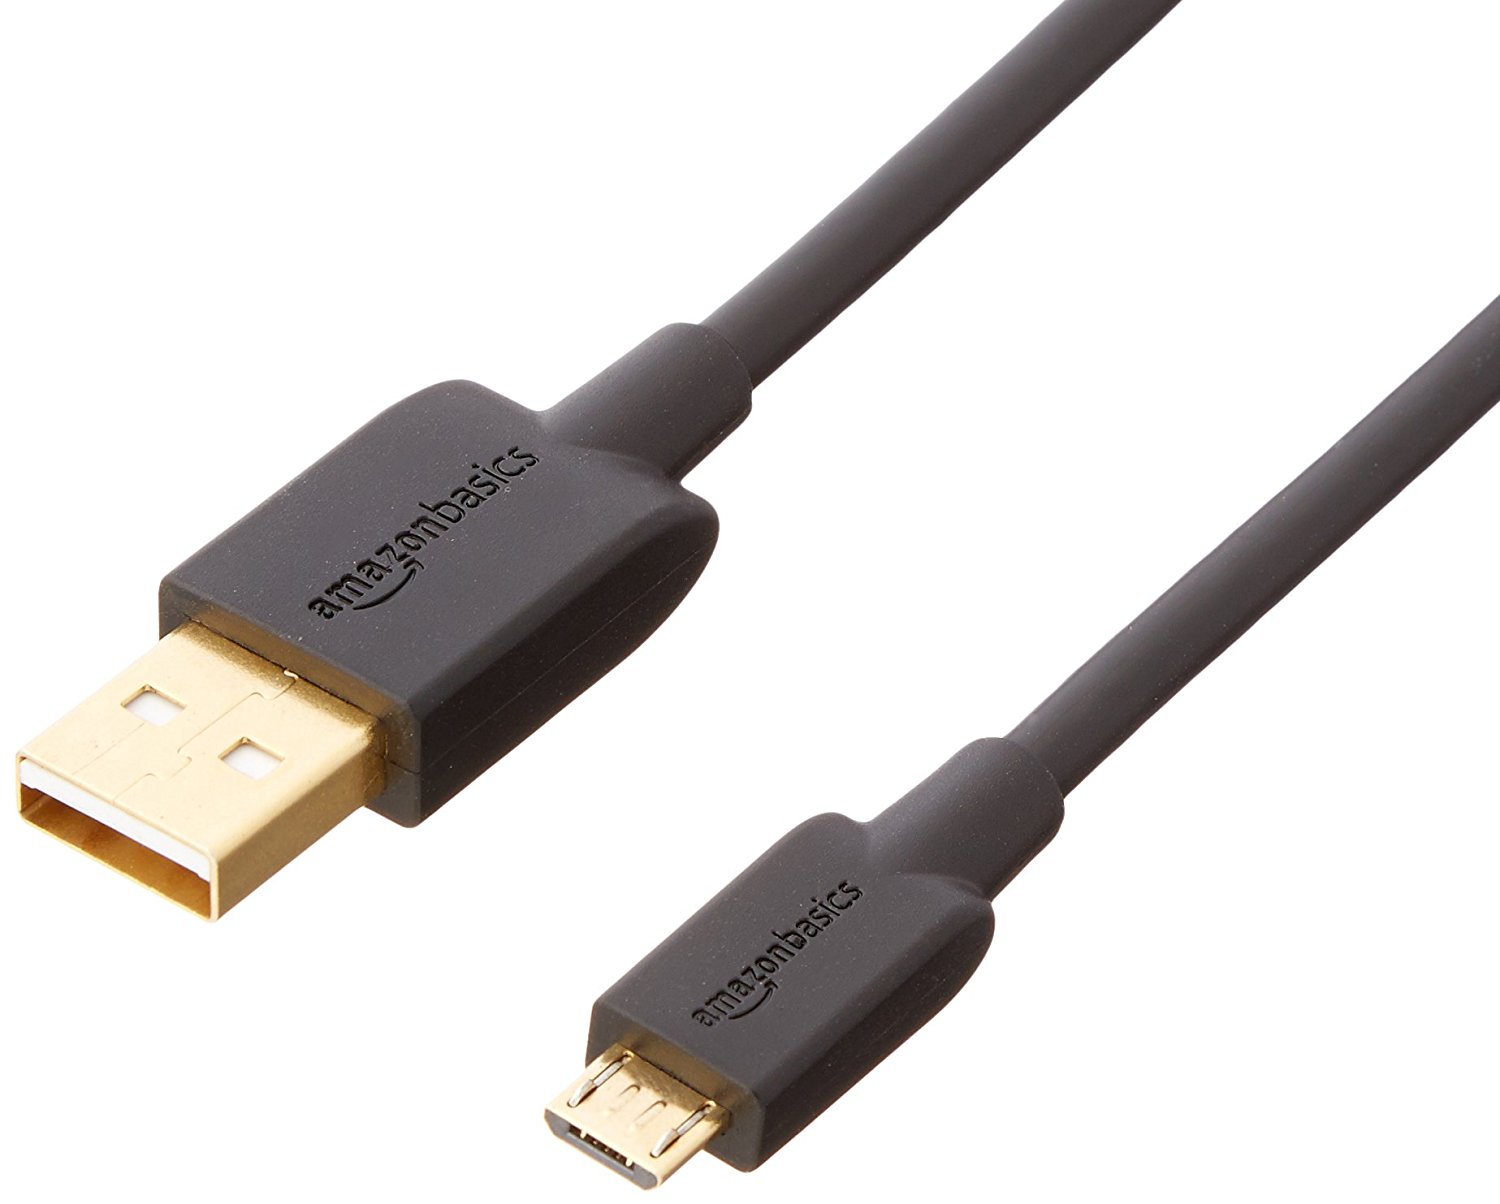
| Micro USB Cables (x4) We'll use a short USB cable in the enclosure to connect the Raspberry Pi to power and another to connect the battery to the RaspiATX. We'll also use one to connect the battery to the relay and another to connect the USB-C charging port on the front to the battery controller board. You might have tons of these lying around already, but if they're too long they're going to use up valuable space in the enclosure. These are all 12" long but you could replace 2 of them with 6" ones if you want to get really space efficient. | $7.99 |
| 1/8" Audio Cable This will connect the Sound Blaster audio card to the input of the audio amplifier. We're going to cut one end off and wire it directly to the amp. Again, you might have some of these lying around. | $4.99 |
| Wire We'll need some random wire lengths to hook up various components. 22ga is good size for what we'll be hooking up—power between the relay and amplifier, the speakers, etc. | $6.99 |
| Total | $436.90 |


Construction Components
Here's everything needed to build the box itself. This is the easiest section to save money in. I went with solid brass hinges and locks but you could get something from Home Depot for a lot less. Of course, some of the construction steps may change significantly if you go with different hardware. I didn't bother breaking down costs here since it will vary greatly depending on the options you pick.
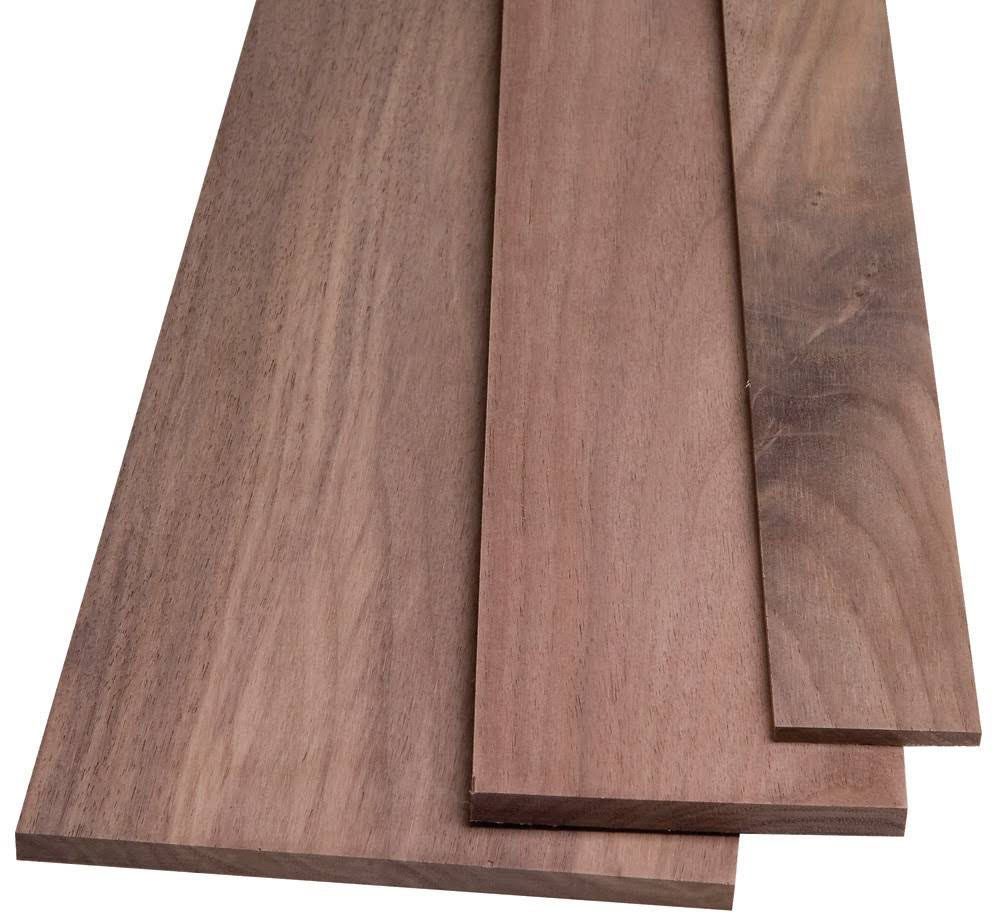
| Solid Wood This can be pretty much anything you want. You can get it locally at a home center, or if you're lucky you'll have a real hardwood lumberyard nearby. You can also buy it online and will probably be your only option if you're looking for something really exotic. If you build your box just like mine you'll need about 3 board feet of wood (1 board foot is 12" x 12" x 1" thick). 3 board feet assumes no waste and you really know what you're doing. See the Design and Construction sections for how the box is built and you'll get an idea of how much to buy. There's more talk about wood selection in the Design section. | |
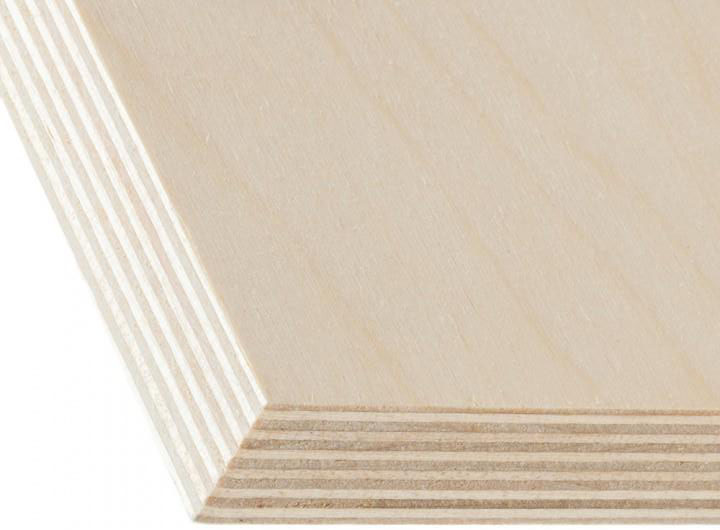
| Plywood Because of how wood moves, you can't build a largish box completely out of solid wood—it will expand and contract as the seasons change and destroy itself before too long. Our box will have the top and bottom built from plywood covered by a thin veneer of the same wood as the sizes. You'll need 2 square feet of 1/2" plywood (12mm in Baltic Birch sizing) for the top and bottom and another 2 square feet for the base that holds the controllers and pocket on the side. You also need 2 square feet of 1/8" (4mm) ply for the front panel and top layer of the bottom insert. You may not be able to find these sizes at your local home center—they usually carry 3/4". You can buy it online but will be much cheaper at a local store (that link above is $25 per sheet, but I can get it locally for $9). And the bigger the sheet is, the cheaper it will be per square foot. Look for Baltic Birch if you can find it. If you like the look of it you could build the whole box out of plywood and save some time and money versus building the sides out of hardwood. | |
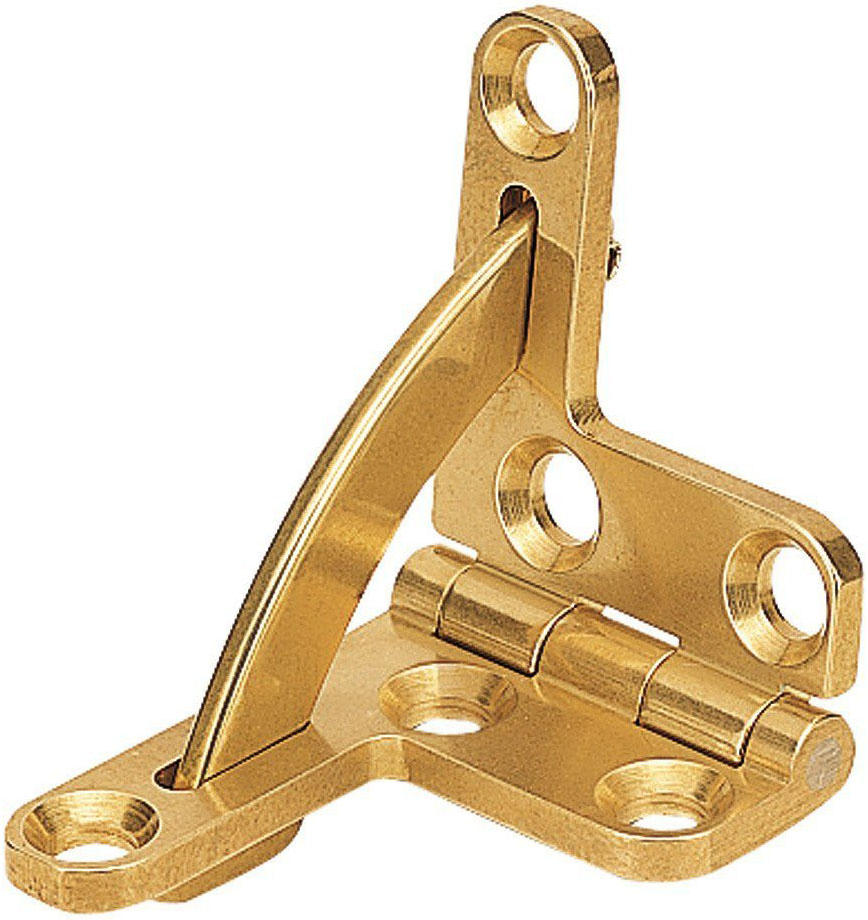
| Hinges (x2) The lid to the box will be relatively heavy when open. Quadrant hinges are perfect for this as they have a stop built in that will prevent the lid from opening any further and the solid brass looks amazing. There are other versions available, but aren's nearly as good looking (in my opinion). You could also go with a basic hinge and use a chain or piece of leather to keep the lid from opening too far. | |
| Box Catch/Lock A nice catch to keep the lid from opening. Again, another place where you could save money by going with something like this or even a lock. Maybe something a little more steampunk? There are lots of options. | |
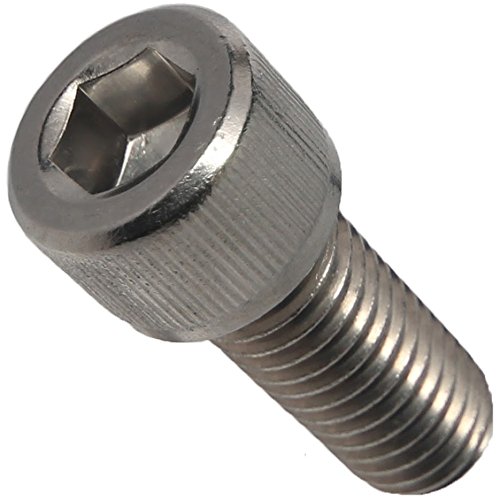
| #10-24, 3/4" screws (x4) The screws for attaching the front panel to the box. I like these socket head screws but they're pricey. This is another place where you can save money by picking up some plain screws for $0.15 a piece at Home Depot. Just make sure they're the same thread size: #10-24 and 3/4" long. | |
| #6-32, 3/4" screws (x8) These are the screws needed to attach the speakers to the front panel. The same advice applies as above. Again, 3/4" long. | |
| Scotch VHB Tape In lieu of screws or other attachments we're using this extremely sticky two sided tape to mount everything to the back of the screen. You can probably find a smaller quantity at your local Home Depot, but this is the stuff you're looking for. | |
| Felt I lined my controller pockets and the cable pocket with felt to keep everything nice and cushioned. | |
| Magnets For some strange reason I couldn't find these small size magnets on Amazon so here they are at Rockler. We want the 1/2" x 1/8" size. These are for holding the controllers in place when the lid is closed and the pocket lid on the right side of the bottom. You could save some money here by simply not using magents to hold the controllers (make sure the box always stays horizontal, no carrying with a handle) and going with a friction fit on the side pocket (make it a little larger than needed so it wants to stick in place). | |
| Magnet Washers These are the metal plates that the magnets are attracted to. We want the 1/2" size. | |
| Wood Finish You could spend years researching all the ways that exist to finish wood and keep it looking great. I used a simple linseed oil + beeswax mix on the outside of my box and lacquer on the top and bottom inserts. You could go with lacquer for the outside as well which will take lots of coats and sanding to make it look good, but if you take your time and do it right it'll look magnificent. I like a more "natural" look on my projects so I tend to oil the wood. You'll find more finishing resources in the Design section. | |
| Total | $50 - ??? |
Got everything? Let's see how this thing goes together...