Building the Console Box
A complete tutorial for building a Raspberry Pi-powered console and arcade emulator in a portable carrying case.
Box Design
I laid out the construction of the box in Sketchup. There is a free version which actually runs in the browser. After creating an account you can import files and view them. It's available in the Sketchup 3D Warehouse but here's the actual Sketchup file as well:

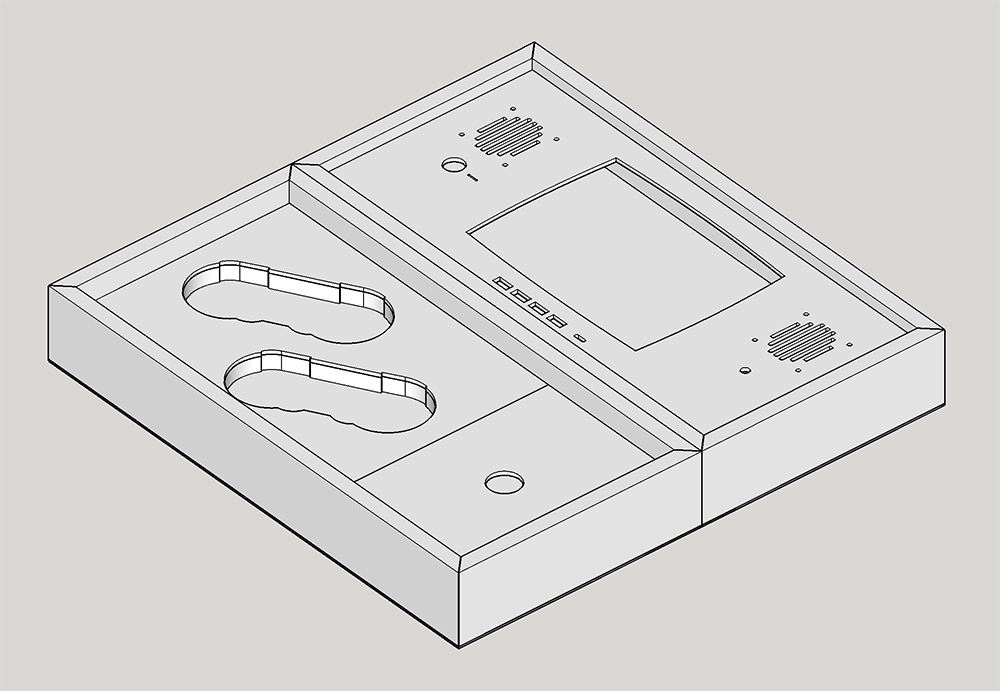
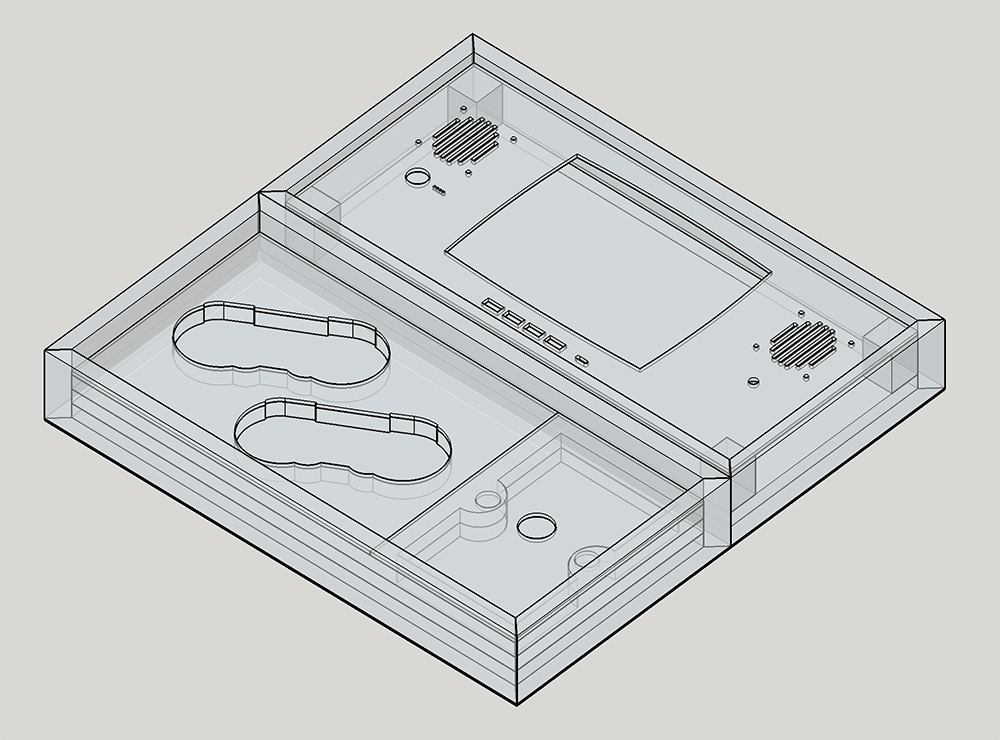
You may not need to use the file at all since you only need a couple measurements which are illustrated here:
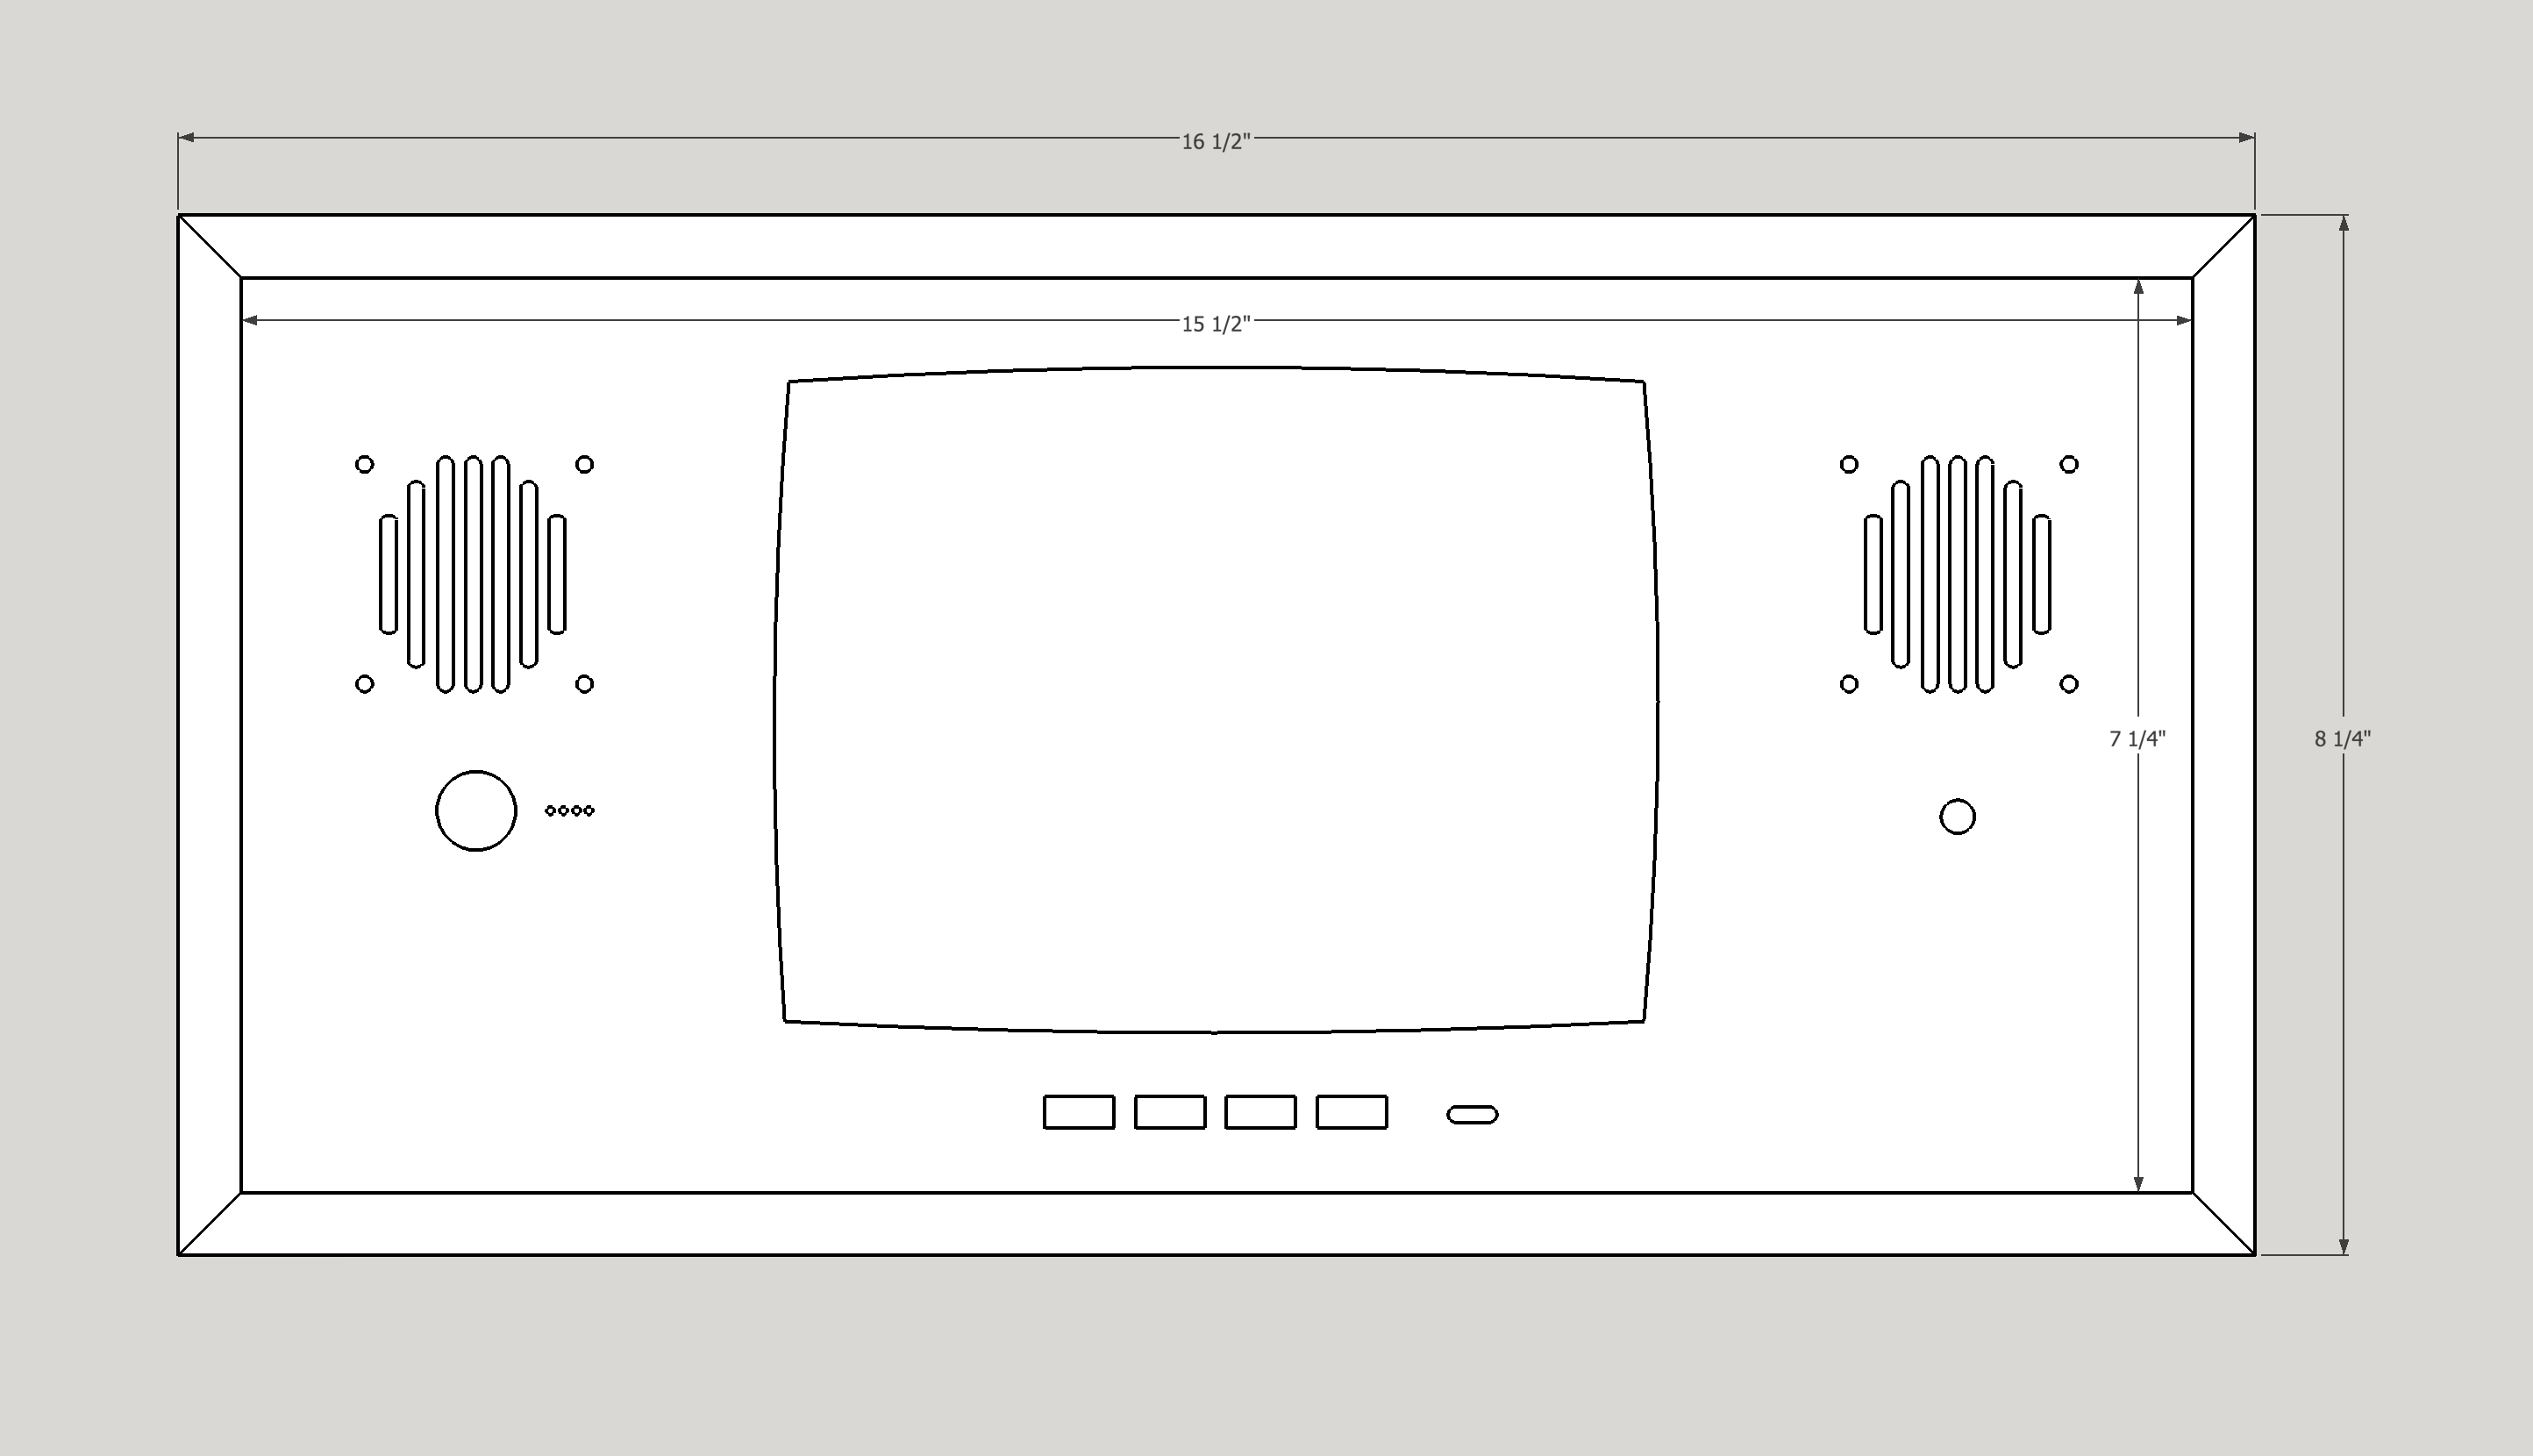
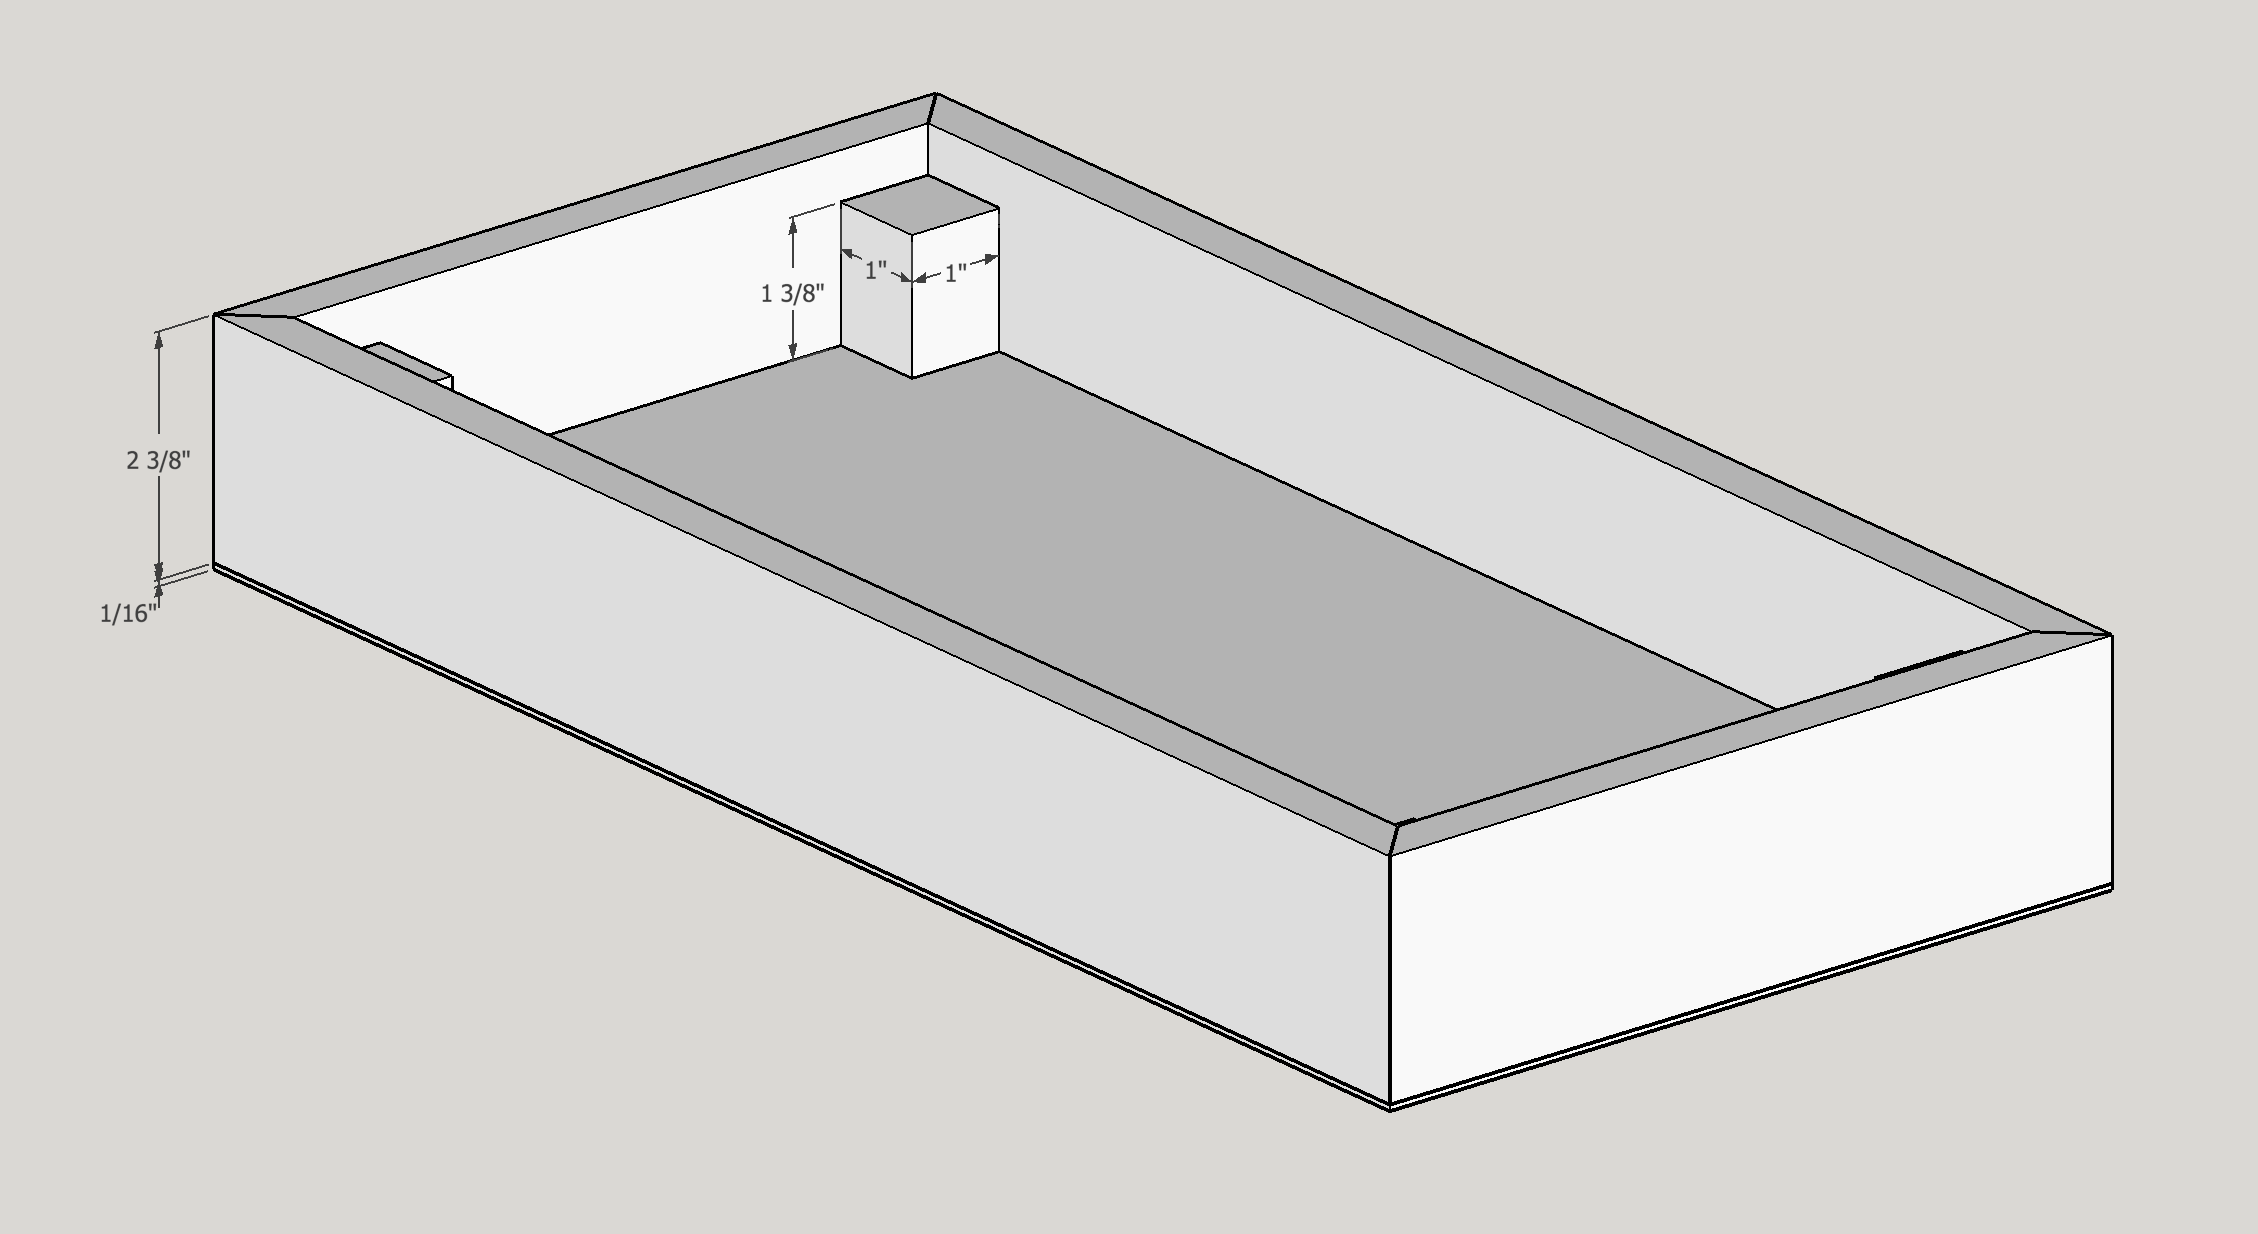
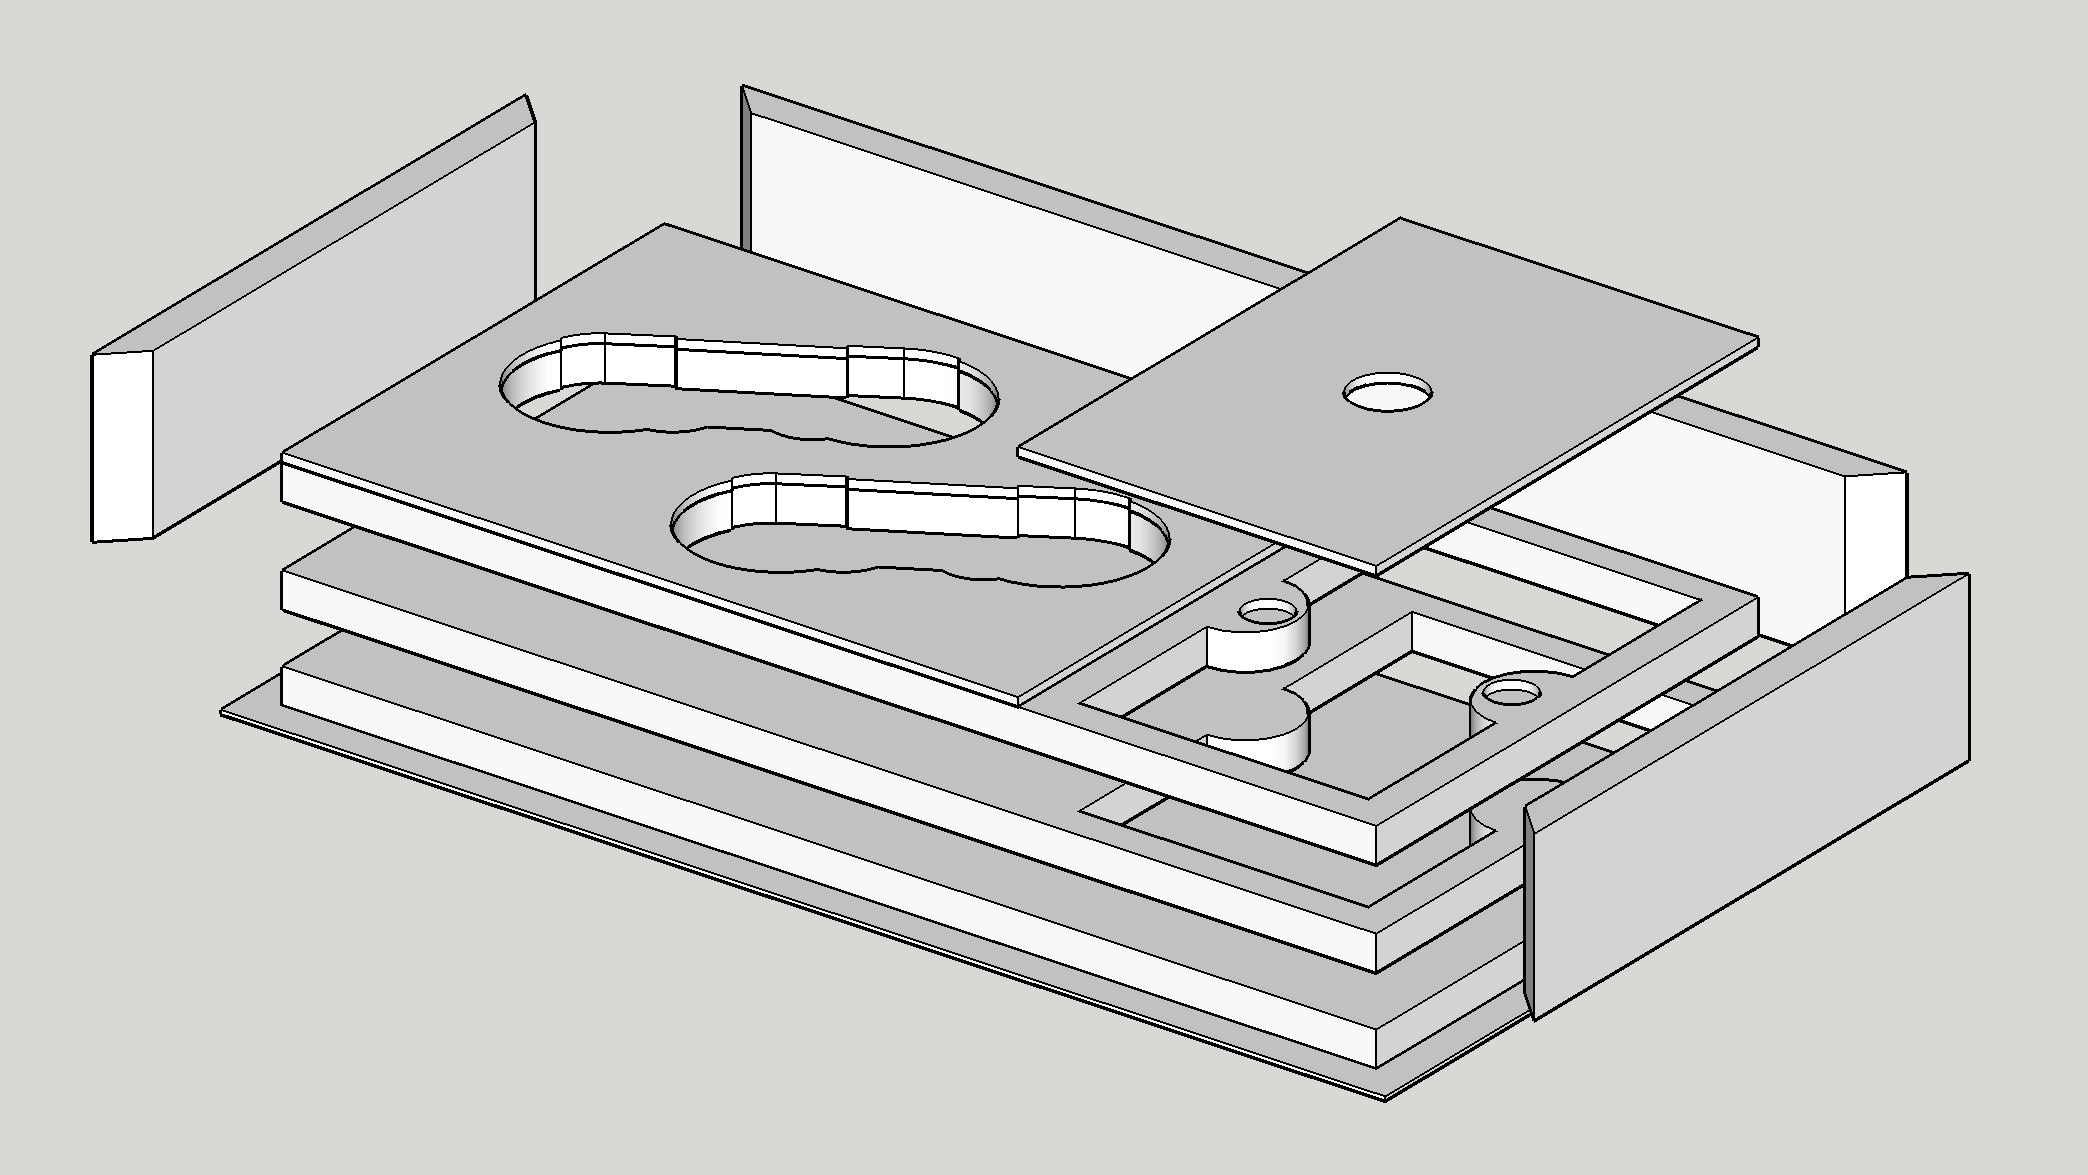
The top and bottom halves of the box are the same dimensions. The sides are 1/2" thick, the bottom and inserts are 1/2" (12mm if you're using Baltic Birch) plywood. The front panel and top level of the bottom insert is 1/8" (4mm) plywood, You can see in this exploded diagram that the sides sit on base that's a glued up sheet of plywood and thin veneer of the same wood the sides are made from.
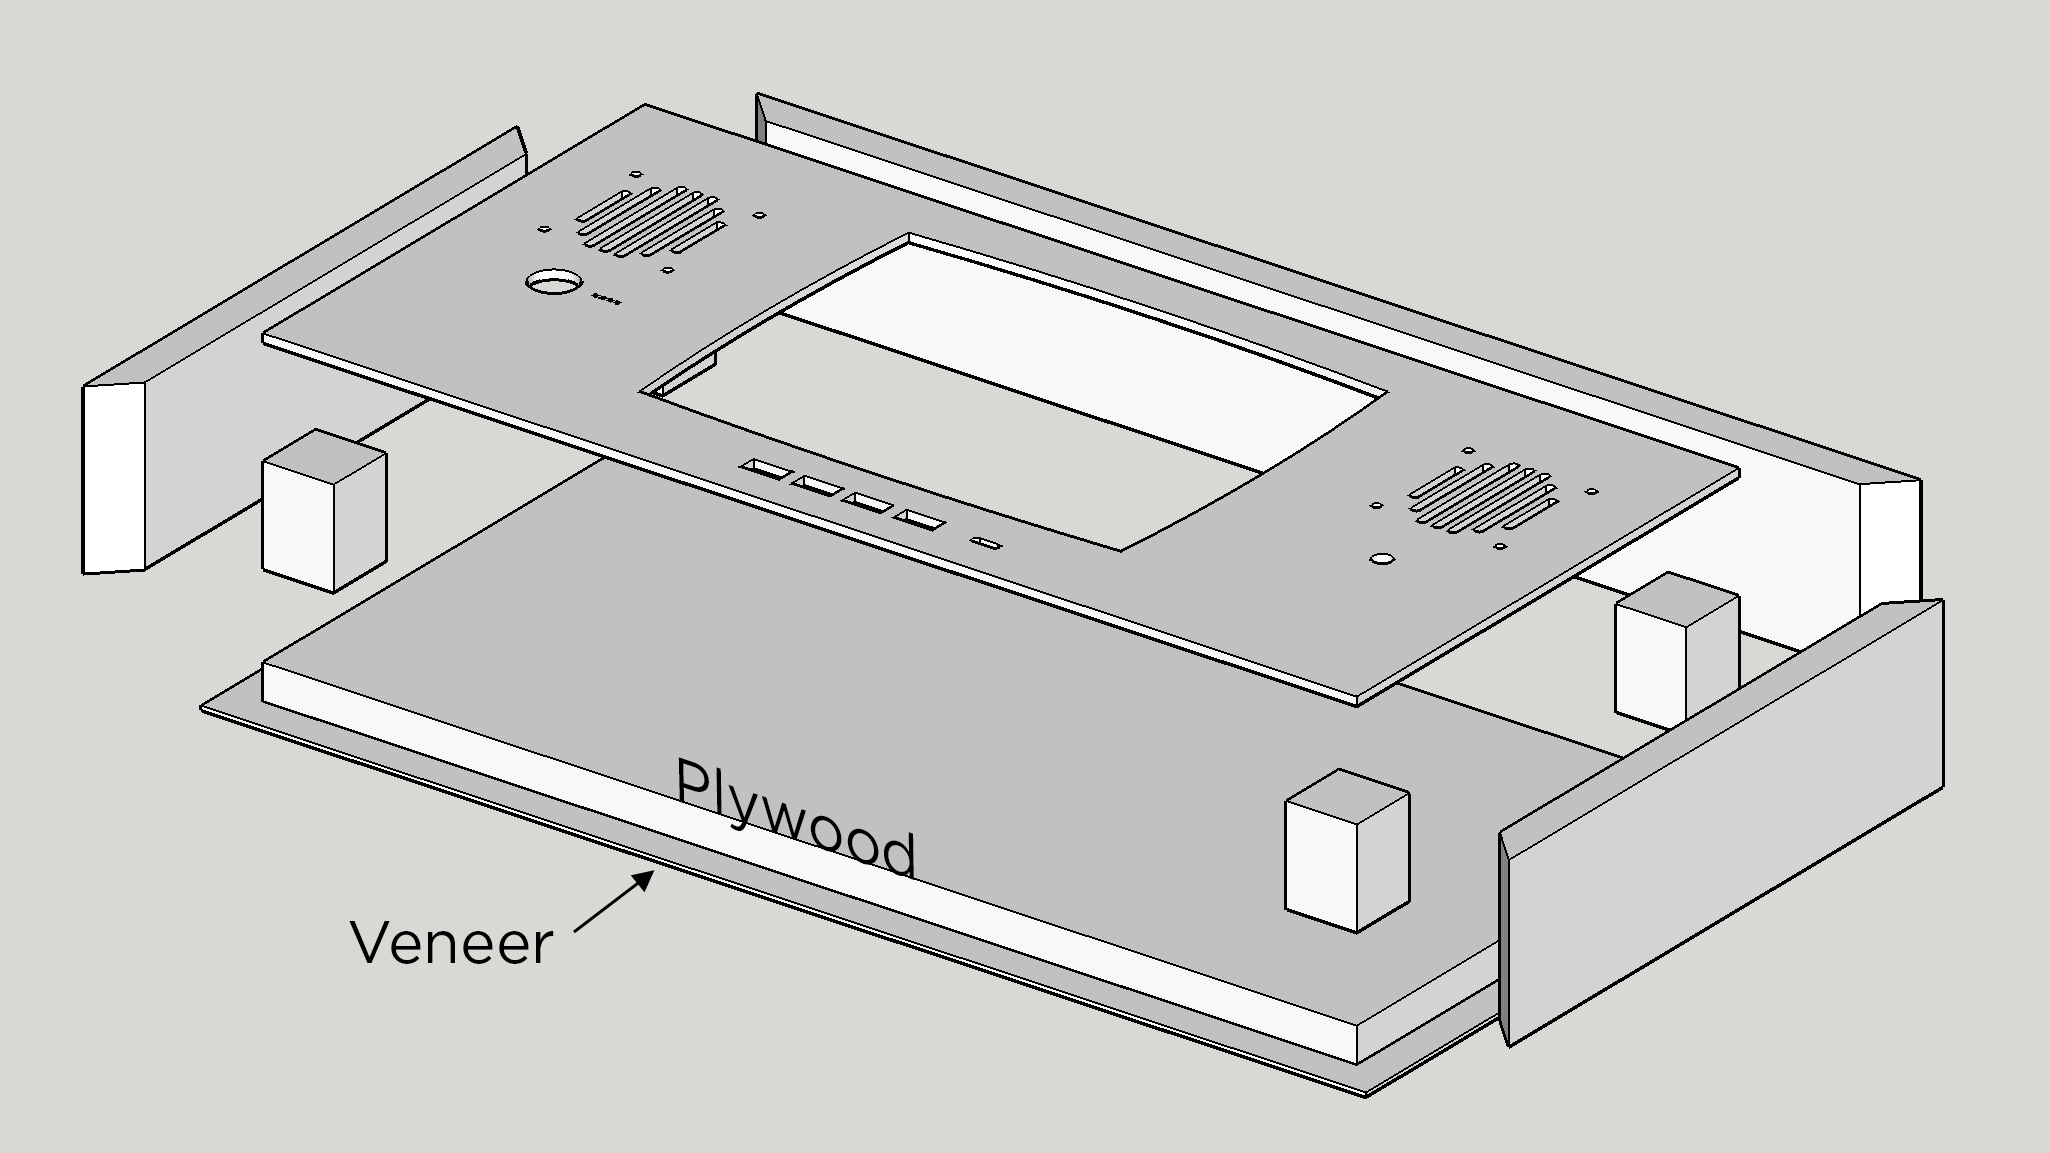
You can buy veneer on its own but it won't match the wood that you build the sides from. I've got a bandsaw so I cut the veneer myself ("re-sawing") about 1/8" thick and then glued it to the plywood.
The bottom insert is made from several layers of plywood sandwiched together with each level milled a little differently in order to have the controller raised a little, a deep pocket for cables and accessories, and a lid for that pocket that sits even with the top of the controller pockets.
These measurements don't really need to be exact as long as you leave enough room for all of the electronic components to fit behind the front panel. You could probably lose an inch in both the width and height if you're careful about where you place your components during assembly. The real limitation to the size is fitting the speakers on either side of the screen, and then fitting the USB hub below the screen.
CNC Files
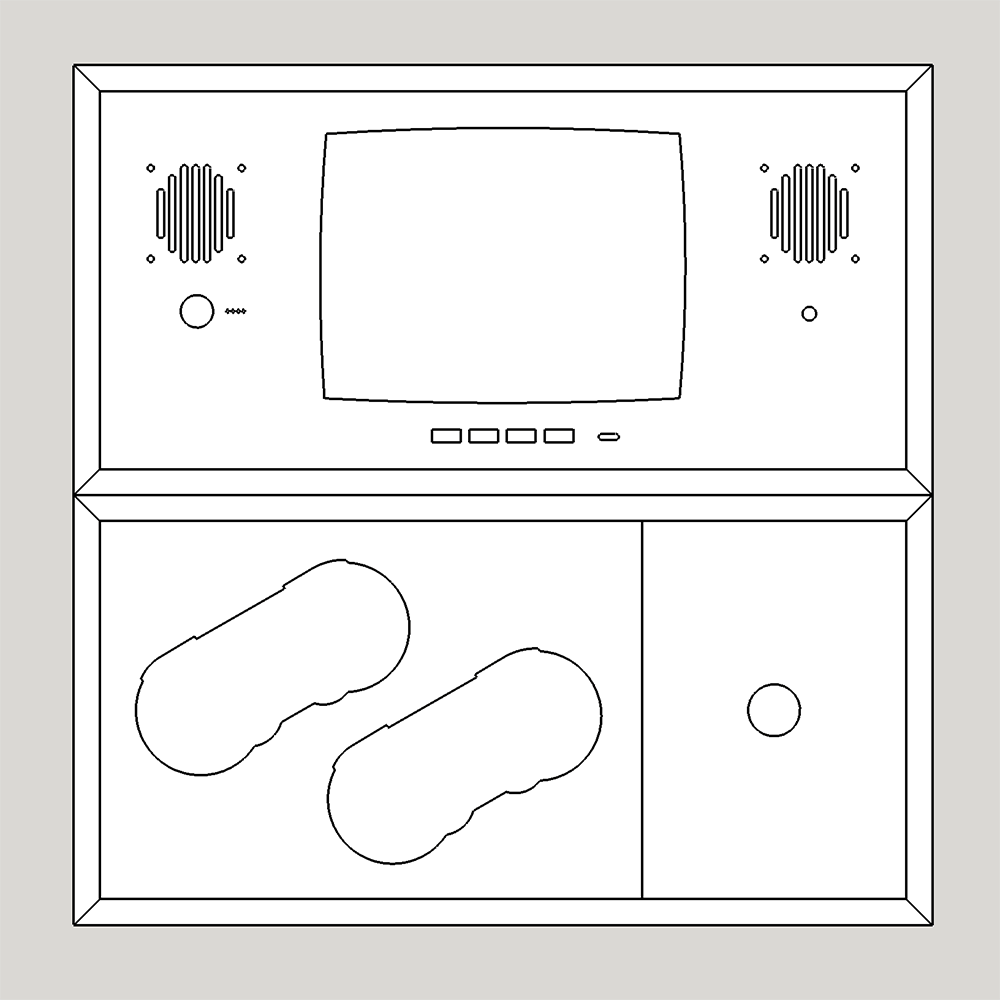
Cutting the front panel is the part that a spent a lot of hand wringing when trying to figure out how to make it. I've got plenty of woodworking tools, but none of them would really help to create something with these smooth curves. Luckily I have a simple CNC machine that I got a couple of years ago which was perfectly suited to the job. You could also cut this part with a laser, but you'd end up with a lot of scorched wood and would need to paint the front panel to hide it. If you go with my recommended speakers then you'll need a small speaker baffle insert between the speaker and the back of the front panel.
Here are the SVG files and the gcode used to run the machine. Note that the front panel has 2 gcode files: one for cuts made with a 1/8" (0.125") bit and another for a cuts made with a 1/16" (0.0625") bit:
 console-box_front-panel.svg
  console-box_front-panel-0.125.gcode console-box_front-panel-0.0625.gcode
 - console-box_bottom-layer1.svg console-box_bottom-layer1.gcode
- console-box_bottom-layer2.svg console-box_bottom-layer2.gcode
- console-box_bottom-layer3.svg console-box_bottom-layer3.gcode
- console-box_speaker-baffle.svg console-box_speaker-baffle.gcode
 console-box_front-panel.svg
 console-box_bottom-layer1.svg
 console-box_bottom-layer2.svg
 console-box_bottom-layer3.svg
 console-box_speaker-baffle.svg
Don't have a CNC machine? I'm thinking about selling these parts myself...I'll update this section if/when I do. There are sites like 100k Garages where you can find someone local to cut it for you.
Electronics Design
Coming soon...